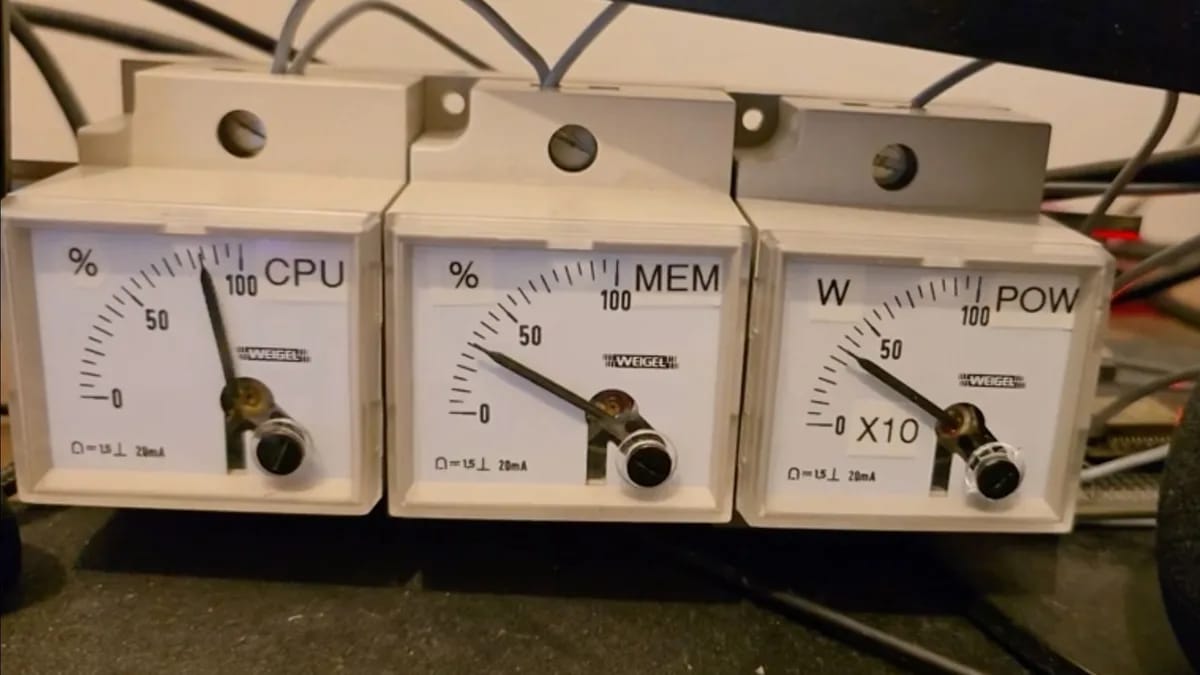
An analog PC monitoring dashboard is a hardware interface that uses physical gauges to display real-time computer metrics like CPU load, RAM usage, or network throughput. By utilizing an ESP32 microcontroller as a bridge between your operating system and vintage analog hardware, you can transform discarded instrumentation into functional performance monitors.
At Groundwork, our analysis shows that while digital overlays like MSI Afterburner or Task Manager provide granular precision, tactile interfaces increase user awareness of system load without cluttering the screen. This project leverages the ESP32’s ability to communicate via serial protocols to drive voltage-controlled analog gauges, effectively bridging the gap between modern data processing and retro-analog aesthetics.
Analog gauges provide immediate, low-cognitive-load visual feedback that is often faster to process than digital text. While a digital percentage requires the brain to read and interpret a value, the position of a needle on a scale allows for instantaneous recognition of system state, such as recognizing that a CPU is reaching a dangerous thermal threshold at a glance.
Research into human-computer interaction suggests that redundant visual cues—where a digital display handles precision and an analog gauge handles trends—reduce the mental effort required to maintain situational awareness. For power users, gamers, or workstation operators, this physical feedback loop creates a 'dashboard' effect that mirrors professional industrial monitoring setups, providing a distinct tactile experience that software-only solutions cannot replicate.
The ESP32 is a low-cost, dual-core microcontroller that serves as the communication nexus between your PC and the analog gauges. To function as a monitoring tool, the ESP32 receives serialized data from the computer and converts it into a Pulse Width Modulation (PWM) signal, which dictates the physical position of the analog needle.
- Install a monitoring script on your PC: Use Python or a specialized bridge application (like SerialDash or custom scripts) to pull system telemetry data.
- Serial communication: The PC sends data packets via a USB-to-Serial connection to the ESP32.
- PWM conversion: The ESP32 interprets these packets and adjusts the duty cycle of its PWM pins.
- Voltage regulation: Because most analog gauges require specific voltage ranges, you will likely need a digital-to-analog converter (DAC) or a simple low-pass filter circuit to convert the PWM signal into a steady DC voltage that moves the needle smoothly.
By utilizing the ESP32’s built-in Wi-Fi and Bluetooth capabilities, you can also potentially decouple the dashboard from the PC entirely, though a direct USB connection remains the most stable method for real-time performance tracking.
Keep exploring
More from GroundworkBuilding an analog dashboard is an excellent exercise in hardware sustainability, as you can repurpose gauges from defunct audio equipment, medical devices, or industrial machinery. Before purchasing new components, check local e-waste recycling centers or online marketplaces for 'VU meters' or 'analog voltmeters.'
When selecting gauges, ensure they operate within a voltage range compatible with your microcontroller (typically 0-3.3V or 0-5V). If you source high-voltage gauges, you will require a secondary power supply and a transistor-based switching circuit to protect your ESP32 from electrical feedback. At Groundwork, our technical assessment highlights that the most reliable builds use 'moving coil' meters, which offer the smoothest movement and require the least amount of complex circuitry to calibrate.
Digital metrics operate on a scale of 0 to 100, but analog gauges are rarely linear. You must calibrate your software to map these digital values to the physical range of the gauge. This process is essential to ensure that the needle accurately reflects the system's performance metrics.
To calibrate, write a simple mapping function in your ESP32 firmware: map(value, 0, 100, min_gauge_v, max_gauge_v). If your gauge is non-linear, you may need to implement a lookup table within your code to compensate for the physical movement of the needle. This level of precision ensures that when your CPU hits 90% load, the needle is physically pointing to the 90% mark on the gauge face.
Once the electronics are functional, the integration phase involves building a housing that complements your PC setup. Whether using 3D-printed enclosures or repurposed wooden frames, the mounting of the gauges should prioritize visibility and cable management.
Ensure that the USB cable connecting the ESP32 to your PC is shielded to prevent electromagnetic interference, which can cause needle 'jitter' or erratic behavior. By placing the dashboard within your peripheral vision, you create a dedicated 'command center' that keeps your primary monitor free of performance overlays, effectively decluttering your digital workspace while maintaining full oversight of your system's health.